Category: Preparations

Before I hit the trail, there is lots of planning and preparation to be done. Come along and take a peak over my shoulder.

  • First aid kit & blister prevention

    First aid kit & blister prevention

    With pharmacies available every few kilometers, I do not feel compelled to carry much in the way of first aid supplies.  I will, however, carry a small kit to hopefully prevent and deal with blisters should they occur. Hopefully, I’ll only need to administer aid to others and stay blister-free.

    Blisters are caused by friction. The friction can be from ill-fitting shoes (too big or too small) or due to moisture from sweat, rain or stepping in water.  The best way to avoid blisters are to have shoes that properly fit (and that you have trail proven before your big trip) and keeping your feet dry.

    Keeping feet dry involves a variety of strategies:  #1 – I’ve already posted about my choice of merino wool socks.  These wick away moisture and I’ve found that even after long periods of walking (10+ miles) my feet are dry.  Strategy #2 is to let your feet breath.  When I walk the Camino, I expect to stop every couple of hours for a refreshment break. At each break, I’ll take my shoes and socks off to allow my feet to air out.  Strategy #3 is to change socks if your feet do get wet.  Socks are the only thing I plan to carry more then one extra pair.  If my feet get wet, I’ll put on dry socks and hang the wet pair on the outside of my pack to dry.

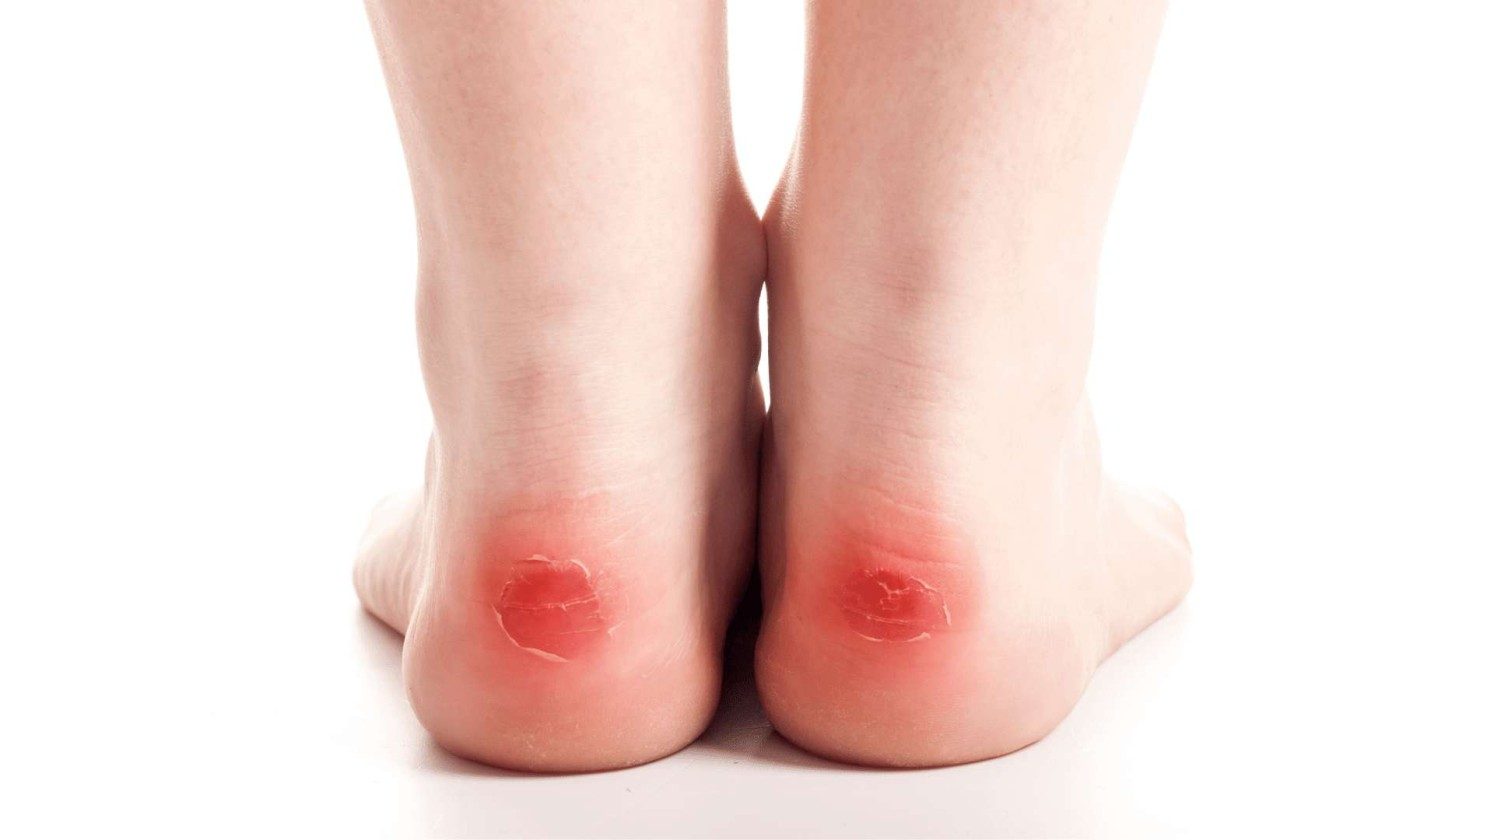
    I don’t know if a blister is technically considered a second-degree burn, but like burns, before a blister appears, you will have a “hot spot” which is akin to a first degree burn with red, irritated skin.  If you experience a hot spot, you should stop and take immediate steps to prevent further irritation and head off the formation of a blister.  I’ve heard many strategies for this:  a blister patch, like Compeed; sock liners; medical tape; applying Vaseline; or my plan of using lamb’s wool

    If you do get a blister, the best advice is to leave it alone and let it heal.  But for many hikers, this isn’t considered an option because it will mean a delay (or even cancellation) of their hike.  For this reason, blisters are typically pierced with a sterile threaded needle.  The needle and thread are run through the bubble of the blister (without breaking the lower skin layer).  The thread is then clipped, leaving a bit of thread on each side of the bubble to allow any fluid to wick out. The area around the blister should be cleaned with an alcohol wipe or other disinfected.  Please note, that this process does introduce the potential for infection and should be used with caution.  If you notice any redness, inflammation, pain or colored fluid, seek medical attention.

    Mini sewing kit; band-aids; Compeed pads and alcohol wipes.

    So, the micro first aid supplies I will start with includes:

    • Alcohol prep pads
    • Sewing needle and thread
    • Band-aids
    • Compeed blister pads

    Total weight:  13 grams – including the Ziplock  baggie (less than one half ounce)

  • Staying connected

    Staying connected

    Most of us travel with our cell phones these days.  But if you do not make a few adjustments to your normal cell phone use regime when traveling, you may be in for a shocking cell phone bill upon your return.  Fear not, there are a variety of strategies available to you that will keep you from having a heart attack when you see the roaming charges on your bill.

    The simplest and cheapest option is to simply turn off your cellular data option on your phone and not place any “phone calls” via your normal calling method.  Instead, rely exclusively on the availability of Wi-Fi and use an app like WhatsApp for your communications back home.  WhatsApp offers video, voice-only calling and texting over Wi-Fi.  I’ve used it extensively both when overseas and when communicating from home with friends and family in other countries.

    A word about using public Wi-Fi:  in most of my travels, I have found Wi-Fi readily available in hotels and restaurants as well as various public facilities.  I always make sure to have a VPN service enabled when using Wi-Fi as another layer of protection.

    The downside of relying exclusively on Wi-Fi is that if you are out and about, you may not have access to tools on your phone that are important while traveling (e.g. mapping tools; translation apps; etc.).  If you want to always be able to use your phone (assuming cellular coverage) you will need to make use of a data package.  Some folks purchase a ‘burner phone’ for the locality they are visiting and buy a SIM card with a small data plan.  This isn’t a bad option if you are staying in one country but can be more challenging if your travels involve multiple countries.

    You can check with your cellular carrier about international plans they may offer.  For example, I use T-mobile, and they offer a 30 day pass with 15GB of data and unlimited calling for $50.  For my 38 day trip, I’d also need to add on a 10-day pass (with 5GB) for $35.  So for $85, I would have passes to cover my entire trip and with 20 total GB of data.  Another option available to me with a Magenta plan is unlimited data and texting and calling at 25 cents per minute.  That works out to being even with the $85 option as long as I don’t make more than 9 minutes of calling per day.

    In my experience, the best option is to purchase an eSIM card.  This is a virtual SIM that lets you use local cellular providers.  These can be purchased online ahead of time and then activated when you reach your destination.  I use a company called alosim.  They offer a Western Europe card that works in Spain and Portugal.  I can purchase a 30 day/10GB card for $25.  Not knowing how much data I’ll be using, this option seems preferable to me, as if I find my utilization is higher, I can by another 10GB and still be in only $50.  If I need a smaller increment, I can get a 30 day/5GB sim for $15.

  • Trail Crew workout

    Trail Crew workout

    Not all my training is pure hiking.  On Thursday, July 17, I completed my fourth volunteer mission with Trailkeepers of Oregon as we worked to restore trails in the Columbia Gorge that have been closed since the devastating Eagle Creek Fire, which burned over 50,000 acres in 2017.  Eight years later, two key trails remain closed.

    Thursday, I joined a crew of seven working on the Tanner Butte Trail (Trail #410) which has all but disappeared as underbrush has covered the trail and grown tall.  On our crew last week, a couple of our team pushed their way through the underbrush for close to a mile marking where the trail should be with colored ribbon. 

    It was easy to see where our work from last week stopped, as we abruptly hit a wall of vegetation.  The photo below is the “before” shot of what the trail looked like before our efforts began.

    Somewhere in there is a trail.

    The work mainly consisted of using large lopping shears to take down the tall brush.  Then fire rakes were used to pull up some of the underbrush and expose where plants had taken root in the trail pathway.  Then it was work and hands and knees to clip the small brush (blackberry, Oregon grape and other viny plants) from the trail.  We also encountered two trees that had fallen across the trail.  As we had not planned for these, the largest saws we carried were 21” hand saws, which meant each tree (larger around than a telephone pole) took an hour or more for a two person team to cut a gap for the trail.

    After a hard day’s work, another few yards of trail have been cleared.

    After a full day’s work in the sun, we made about 100 yards of progress.  Just six more miles – and several more years – and this trail may be reopened.   I do want to stress that the trail remains closed to the public and the gate at the base is locked.  We were working under the authority of the US Forest Service, which allowed us to pass through the gate.

    If you love the outdoors, I encourage you to consider volunteering for a trail crew or making a monetary donation to help fund TKO’s work.  Cuts in federal funding have left a $500k gap in TKO’s budget for this year.  Any contribution of time or treasure is appreciated.

    One cool thing about our trail crew this time is that we had two women on vacation from New Hampshire who joined us.  They were touring Oregon for a week and one of them worked for a company that awarded extra PTO for doing volunteer work.  It was great meeting them and having them donate a day of their vacation to restoring this trail.

  • Sleeping gear

    Sleeping gear

    I feel like I have spent more time pondering and fretting over what to carry for sleeping than just about anything else.  My plan is to mostly sleep in alberges (special hostels just for pilgrims) and what is provided for you can vary dramatically.  On top of the variability of what is provided is the fact that I’ll likely be starting in hot weather in southern Portugal and finishing in cool autumn weather in northern Spain.

    After much consternation, I’ve decided to take both a silk sleeping bag liner for warmer nights and a lightweight sleeping bag for cooler evenings or when the alberge doesn’t provide blankets.  The sleeping bag liner is from Sea to Summit.  I opted for the rectangular option versus a mummy as I don’t like feeling bottled up at my feet.  It’s a silk blend which I chose because I have learned that bedbugs can’t penetrate a silk fabric.  Yes, bed bugs are a thing and I’m taking a variety of precautionary steps to avoid them (another blog topic). This liner is ultra-light at only 160 grams.

    My sleeping bag is also from Sea to Summit and is the Traveller 45F Down Bag/Blanket.  It’s not going to keep me warm if I go snow camping, but the 45 degree rating should take care of the most chilly nights I’ll encounter and I can add my liner inside of it for additional warmth if needed.  It will be the heaviest thing I carry (except the pack itself), but at 585 grams (1.29 pounds) it’s about as light as you can get for a sleeping bag.

    My sleeping gear is rounded out with a set of ear plugs and a sleeping mask.  Some of the alberges have rather large bunk rooms and these will help me sleep through the snoring and flashlights that might go on.  I will also have my headlamp as part of my sleeping equipment.  The headlamp features a red light setting so if I decide to leave in the morning before daylight, I won’t blind people as I round up my gear.

    All the sleeping gear fits into the compression sack for the sleeping bag

    All of these items fit neatly into the compression bag for the Traveller.  When compressed, all take up the space of a cylinder about 4 inches by 6 inches.

    Total Weight:826 g (1.8 lb)
    Total Weight in Pack:826 g (1.8 lb)